Take a Screenshot on Chromebook (Updated July 2022)
In this guide, we have included 8 methods to take a screenshot on a Chromebook, including full-screen, partial, and window screenshots. The below method works on all kinds of Chromebooks, be it a school Chrome OS device or your personal Chromebook from Lenovo, HP, Asus, Acer, and others. Check out the table below to find the relevant section. Also, if you wish to take your Chromebook skills to the next level, check out some cool Chrome OS tips and tricks as well.
How to Screenshot on Chromebook with Keyboard Shortcuts
1. Full-screen Screenshot on Chromebooks: Ctrl + Overview key
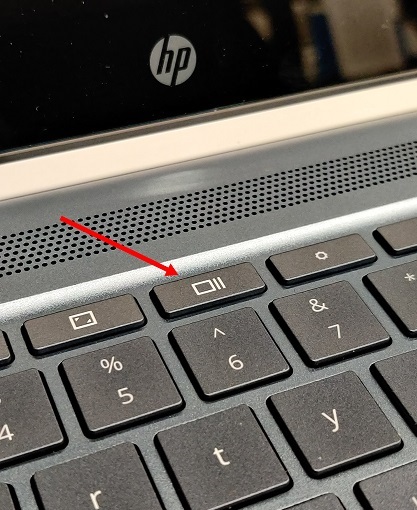
If you want to learn how to quickly take a screenshot on Chromebook, the easiest way is to press the Ctrl and the Overview button at once. The overview button is present above the “6” key.
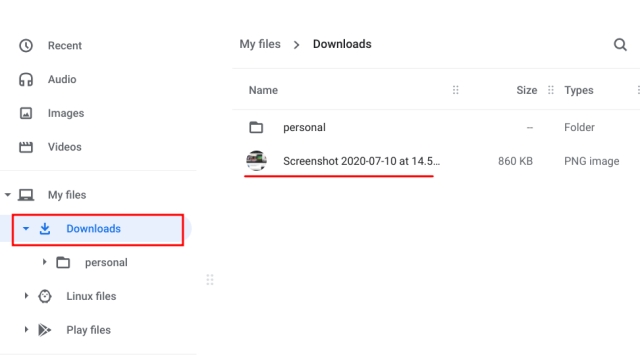
It will instantly take a fullscreen screenshot, and the snapshot will be saved in the Files app under the “Downloads” folder. Just open the Files app, and you will find the screenshot in this folder.
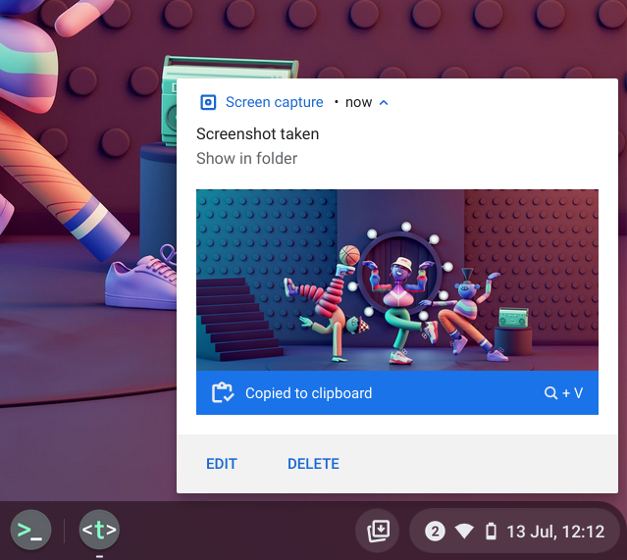
Apart from that, when you take a screenshot, a pop-up shows up in the bottom-right corner. From there, you can click on “Edit” and annotate the screenshot as well. You also have the standard photo editing tools like cropping, resizing, adding filters, and more.
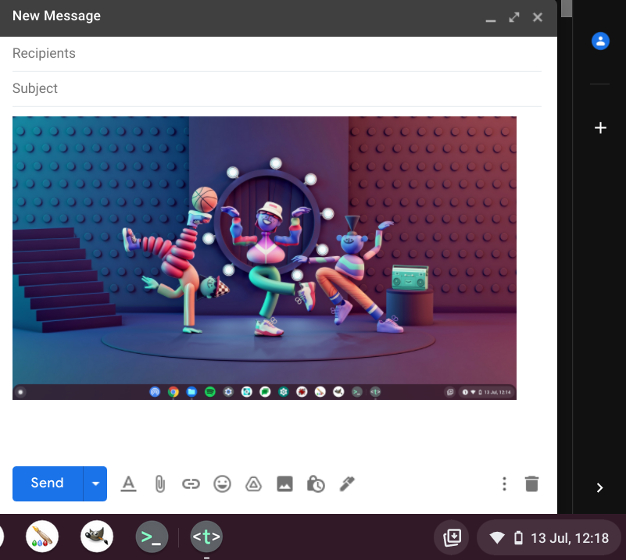
Since screenshots are automatically copied to your clipboard on Chrome OS, you can paste the screenshot directly into your favorite photo editor for Chromebook, Gmail, or any other media field. For example, in the Gmail Compose window, I can use the Chromebook keyboard shortcuts “Ctrl + V”, and the screenshot has been added.
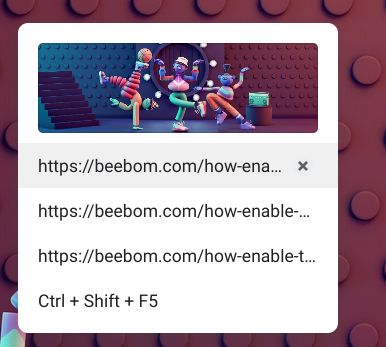
Also, if you enable the clipboard history feature in Chromebook, you can find past screenshots, copied images, texts, etc., using a Chrome OS keyboard shortcut. Just press the “Search +V” hotkey, and the Clipboard History menu will show up. From here, you can easily paste your past screenshots. That’s pretty cool, right?
2. Active Window Screenshot on Chromebooks: Ctrl + Alt + Overview key
If you want to find out how to screenshot on Chromebook and capture the active window, press Ctrl, Alt, and the Overview button together. After that, select the window on your screen. You can either hit Enter to capture the active window or click on the window using your mouse. That’s it.
3. Partial Screenshot on Chromebooks: Ctrl + Shift + Overview key
And if you want to freely take a screenshot of a specific area on your Chromebook, press Ctrl, Shift, and the Overview button. The screen will dim, and you can select the perfect area to screenshot on your Chromebook. Personally, I love this shortcut and always use it to take a screenshot on my Chromebook.
Screenshot on Chromebook with Screen Capture
While many love the keyboard shortcuts to quickly take screenshots, in case you want a simple button from where you can capture the screen then Chrome OS has made things easier for you. Google has added a Screen Capture feature to Chrome OS, which lets you take a screenshot on your Chromebook from the Quick Settings menu. Not just that, you can also record the screen on Chromebook with Screen Capture. Here is how to use it.
- First, you must be updated to the latest version of Chrome OS. If you are on Chrome OS 89 or above, this feature will be enabled by default on your Chromebook. Also, the feature is available on all channels, including Stable, Beta, and Dev.
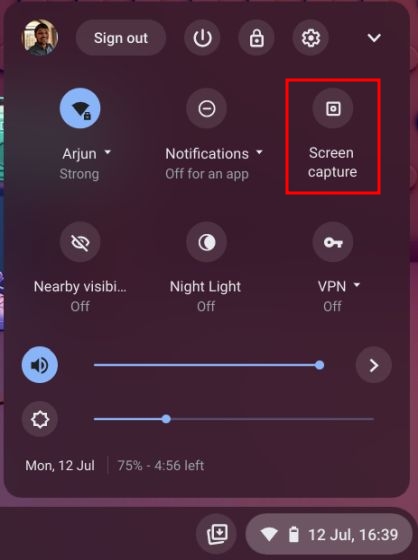
- Next, open the Quick Settings menu on the bottom-right corner, and you will find a “Screen capture” option.
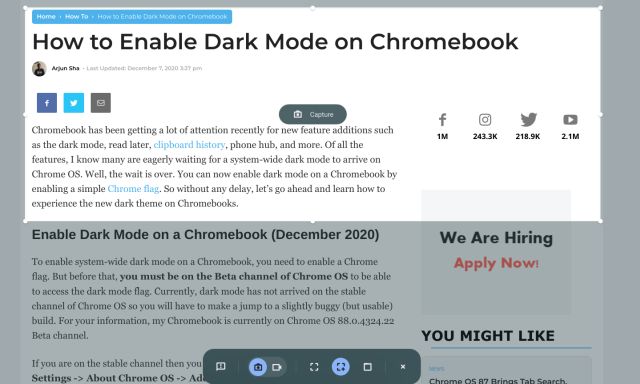
- Click on it, and a tool bar will open up. Now, you can select what kind of screenshot you want – full-screen, window, or partial. Make sure you have selected “Camera” and not the video indicator in the tool bar. For example, I’m capturing a partial screenshot using the screen capture option here. Now, click on “Capture” or hit enter. The screen snap will be saved in the Downloads folder.
- If you want to change the default screenshot folder on your Chromebook, click on the “cogwheel” icon at the bottom and choose “Select Folder”.
- Here, choose the desired folder where you want to save the screen captures. For example, I have created a “Screenshot” folder under “Downloads” for all my screencaps.
- Now, all your Chromebook screenshots will be saved in your newly selected folder.
Take Screenshots with Buttons in Tablet Mode
If you want to screenshot on Chromebook in tablet or tent mode, press the power and either of the volume buttons at once, similar to how you would do it on your smartphone. You don’t need to press and hold; just press and release the buttons at once. A fullscreen screenshot will be captured on your Chrome OS tablet instantly.
If you have an HP Chromebook, the below shortcuts offer clear instructions on how to screenshot on HP Chromebooks in Tablet mode.
Shortcut: Power + Either of the Volume buttons
Capture Screenshots on Chromebook with a Stylus
- Full-screen Screenshot: If you have connected a stylus with your Chromebook, a “Stylus” menu will appear on the bottom-right shelf. Open it and select “Capture Screen” to take a full-page screenshot on your Chromebook. If you have an Acer Chromebook with a stylus, this is the best way to screenshot on Acer Chromebooks.
- Partial Screenshot: If you want to take a partial screenshot, click on the “Stylus” menu and select “Capture Region”. Now, you can use your stylus, or touch and hold somewhere on the screen and then drag to select an area. After that, release the stylus, and a screenshot will be taken and saved to your selected folder.
Take Screenshots on Chromebook with Chrome Extensions
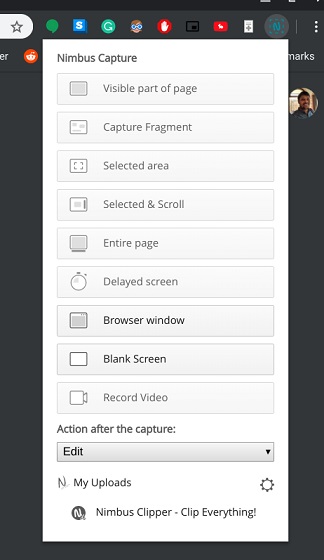
Now, we have learned how you can screenshot on a Chromebook natively. If you are looking for a more versatile and powerful screenshot tool to use on your device, check out the Nimbus extension (Free). It enables you to take all kinds of screenshots and also offers screen recording and on-screen annotation.
If you are looking for some of the other best Chrome extensions for taking screenshots, you can also check out Awesome Screenshot (Free) and Screencastify (Free).
Take Screenshots Using an External Keyboard
- Full-page Screenshot: Ctrl + F5
If you have connected an external keyboard to your Chromebook, you can take a screenshot by pressing Ctrl + F5 at once. It works similarly to the native Chromebook shortcut, but you need to press F5 in place of the overview button. - Window Screenshot: Ctrl + Alt + F5 Similarly, for a window screenshot using an external keyboard, press Ctrl + Alt + F5. It will quickly take a screenshot of the current window on your Chromebook.
- Partial Screenshot: Ctrl + Shift + F5
Lastly, press Ctrl + Shift + F5 to take a partial screenshot using an external keyboard. The screen will dim automatically and you can select a region easily.
Where do the screenshots go on a Chromebook? All screenshots on Chromebooks are saved in the “Downloads” folder. Just open the “Files” app and move to the “Downloads” folder, and there you have it. If you want to change the screenshot save location, you can do so from Settings -> Advanced -> Downloads -> Change. What is F5 on a Chromebook? Simply put, F5 on a Chromebook is the overview key which is generally located above the 6 key. You can press it along with Ctrl to take a screenshot.
What is the Switch Key on a Chromebook? The Switch key is again the same as the overview key. It’s used to switch windows on a Chromebook so it’s called the Switch key.
Screenshot on a Chromebook Like a Pro
So that was our guide on how to screenshot on a Chromebook. We have included all the best ways to capture a screenshot, including native and a third-party extension. While the built-in shortcuts are adequate for me, some users want a complete solution from annotation to free-style crop selection. In that case, go for the third-party app that I have mentioned above. Anyway, that is all from us. If you miss a dedicated Caps Lock key, you can enable the Caps Lock key on your Chromebook. And if you have any questions, let us know in the comment section below.
